

The export procedure allows you to export the historical data present in the instrument’s local database to a text file (csv or txt) to then be imported, for example, in another (or the same) Overcharts installation (using data import procedure) or in another application (usually Excel).
Access Data Export #
You can access data-export in one of the following ways:
- from Overcharts main window > Instruments Tab > Data Export button
- or from Overcharts main window > Instruments menu > Data Export
To export data for a specific instrument:
- From Overcharts main window > Instruments Tab, select the instrument to export
- Right click > Export Data
Export instrument historical data #
The procedure allows you to export the historical data present in the instrument’s local database to a text file (csv or txt).
To export data from one or more instruments, follow these steps:
1. Make sure that any historical data you wish to export is present in the local database. Data is saved in the database ONLY during a total recalculation/refresh of the chart and then when opening the chart/workspace or after connecting to the data-feed. Real-time data is NEVER saved to the database. For example, if you stay connected to your data-feed for 3 days without performing any total recalculation/refresh of the chart, the latest data in the local database will be that of 3 days ago.
Also, the chart MUST be built using the time frame being exported. For example if you want to export 1-Minute historical data, the chart MUST be constructed with a resolution of 1 or x minutes.
To perform a total recalculation/refresh of a chart:
- refresh the chart with the appropriate command (chart window > Maintenance menu > Refresh)
- or close the workspace containing the chart > connect the data-feed > reopen the workspace
- or keeping the workspace open > disconnect and connect the data-feed again.
The historical data interval requested from the data-feed (and therefore saved in the local database) will be only those necessary for calculating the chart. For example, if you want to export the historical data of last 90 days of an instrument, to be sure you have all the data you will have to open a chart of last 90 days or more.
If you have many instruments to update, instead of recalculating/refreshing every single chart, you can also use the massive data download function.
2. Access the export procedure.
3. Set the following parameters:
- Time Frame to export: select the time frame to export. The time frame MUST be present in the database. If the instrument uses standard time frames (99% of cases), there are only 3 time frames in the local database: 1-Tick, 1-Minute, 1-Day. During the export you will necessarily have to select one of these time frames. For example, if you select a 5-minute time frame, NO data will be exported. In fact, 5-minute time frame is NOT present in the local database.
- Date Range to export: define the date range to export
- File Format: File format is automatically set according to the selected time frame. If you are exporting data to back up the database or import it to another Overcharts installation, we recommend using the preset Standard Export formats.
- Data time zone: Select the time zone to use for the data to be exported (default: UTC).
- Bar TimeStamp: (only visible for minute time frames) Select this option if timestamp in the data being exported is the bar closing time. For example, in a 5-minute bar (from 10:00:00 to 10:04:59), 10:00:00 represents the bar’s start-time (On Open) and 10:05:00 the bar’s end-time (On Close).
4. Select the instruments to export by pressing Add button:
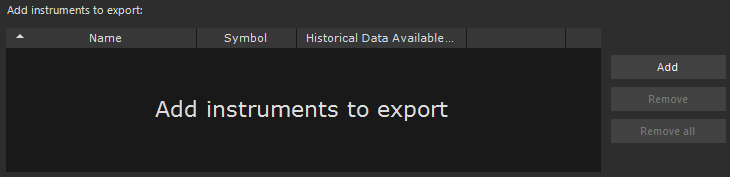
All instruments in the list will be exported to the same text file. For this reason, if the date range to be exported is very large or more generally the amount of data to be exported is very large (for example when the export time frame is 1-Tick), make sure you have enough disk space. The exported text file may be very large (several gigabytes).
In the Historical data available in the database column you can check if date range being exported is available in the instrument database. The column shows first and last date available in the database for the time frame being exported. To make reading easier, column/cell background is colored differently depending on availability:
- Green: date range being exported is available in the database
- Yellow: date range being exported is partially available in the database
- Red: date range being exported is NOT available in the database
- Gray: no data available for the time frame being exported
If the background is NOT green, we recommend you modify the date range to be exported or refresh the instrument chart in order to download (if possible) missing data (see step 1).
5. Define the path, name and extension (.txt or .csv) of the export file. DO NOT include the extension in the file name, but select it using the appropriate combo-box.
6. Press EXPORT button to start the export.
Warnings #
- If the time frame being exported is 1-Tick, you can only export one instrument at a time. This limitation is to avoid creating a text file too large. In fact, 1-Tick time frame can contain millions of data for every single day.


