

In Overcharts you can trade directly from chart and then:
- Place or cancel an order with just one click
- modify the order price with Drag & Drop
- modify the order size
- display all orders you have placed for an instrument/account
- place complex strategies such as Bracket orders, OCO (One Cancels Other) and OSO (Order Sends Order)
- close or reverse an open position
- display last x filled orders on chart
Enable Chart Trading #
To enable chart trading you also need to activate Trading in the Workspace by pressing TRADING button at the top right of Workspace window
Once trading is activated in the Workspace, enable chart trading in one of the following ways:
- right click on chart window > ENABLE Chart Trading
- or from Chart Trading menu (top right of chart window) > ENABLE Chart Trading
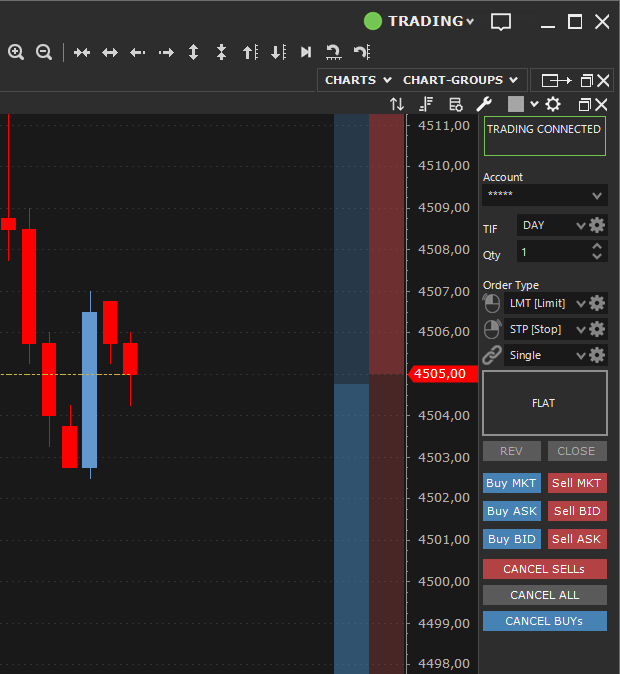
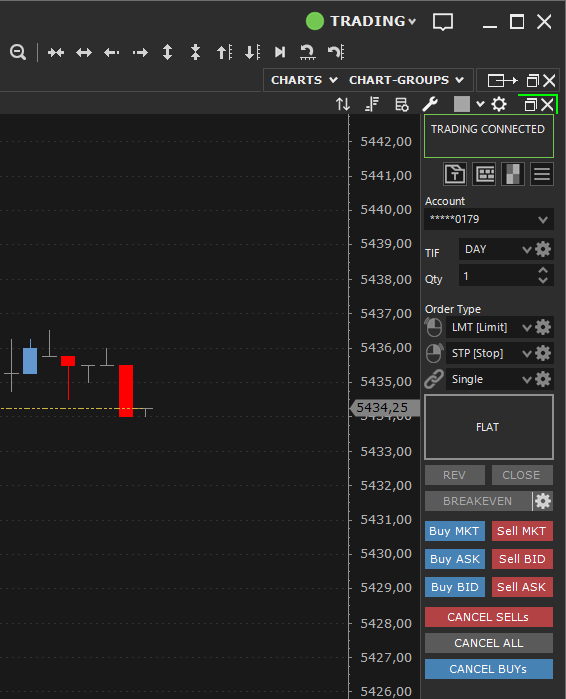
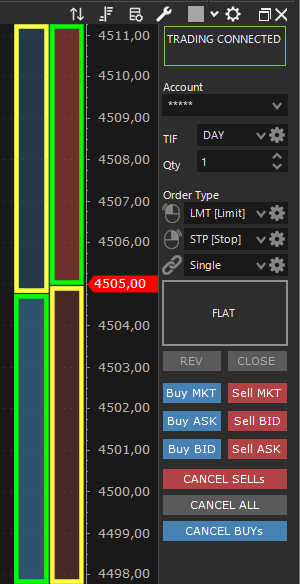
When chart trading is enabled, Bid/Ask columns (blue and red in the image below) are shown in the chart window to be used for placing orders, and Trading Panel (where you can set all parameters of the order to be placed):
You can trade ONLY the window main chart, i.e. the one identified by symbol at the top left of chart window. In other words, if in the same chart window there are multiple overlapping charts (even of the same instrument), you will be able to trade ONLY the main chart.
Reduce Trading Panel to Gain Space #
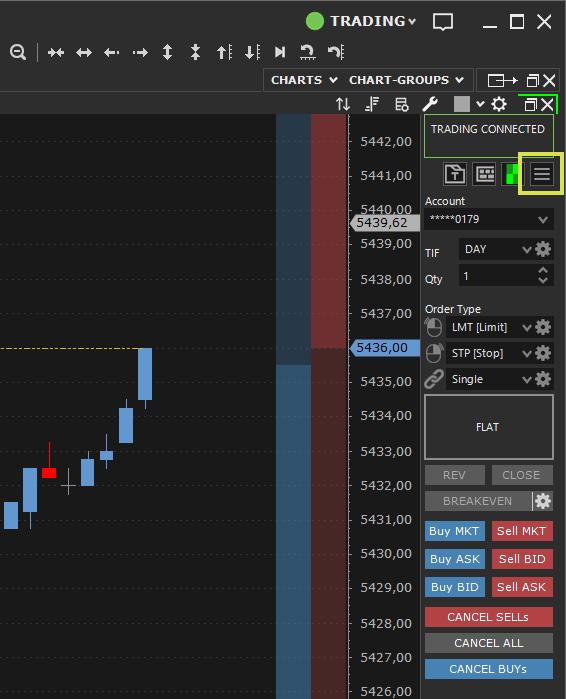
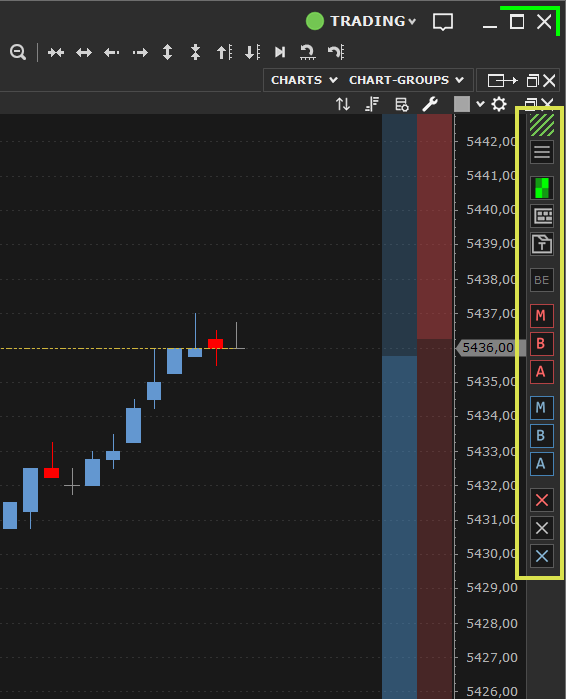
Sometimes, Trading Panel can be cumbersome, significantly reducing space available for the chart. To maximize available space, you can partially hide Trading Panel, reducing it to a toolbar without losing trading commands.
Press the highlighted button in the image below to transform Trading Panel into a Toolbar:
Hide Bid/Ask Order Entry Columns #
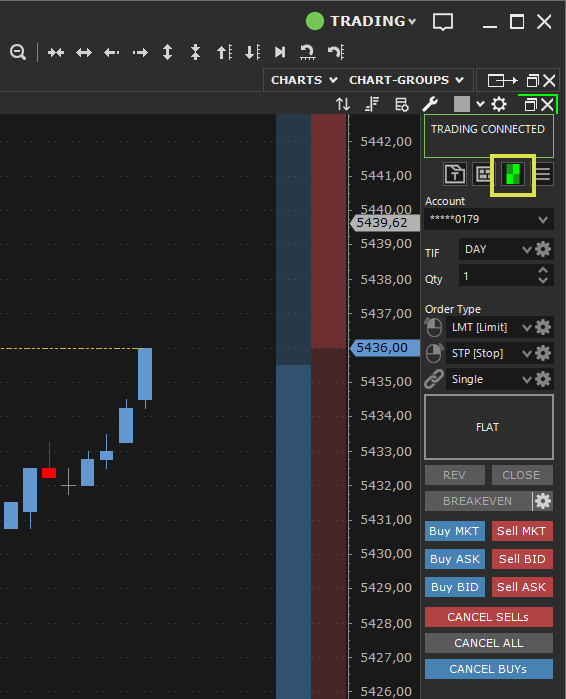
Enabling chart trading also shows Bid/Ask order entry columns (see following sections). Clicking on these columns with the mouse places an order immediately. To avoid accidental orders, hide Bid/Ask columns and display them only when needed.
Hiding Bid/Ask order entry columns you will be able to have trading enabled on the chart without risking accidental orders.
To show / hide Bid/Ask columns, press the highlighted button in the image below:
Place an Order #
Chart Trading uses Trading-Panel to place an order. Trading-Panel contains all order information: Type, Quantity, TIF etc. Trading-Panel also displays information on account/instrument current position and allows to close or reverse the position, cancel all orders of a specific instrument, and many other functions. For more info on Trading-Panel, see the page: Trading Panel
To place an order, please follow these steps:
1. Set order type corresponding to the mouse left and/or right click according to the order to be placed. In Overcharts there are 2 macro categories of orders: LIMIT ORDERS (which include limit, iceberg, market if touched etc. orders) and STOP ORDERS (which include stop, stop limit, trailing stop, trailing stop limit etc. orders).
Available order types may change depending on data feed
To place a LIMIT order, select “LMT [Limit]” order type in the combo-box associated with mouse left click.
To place a STOP order, select “STP [Stop]” order type in the combo-box associated with mouse right click.
Then define whether it is a Single, OCO, OSO or Bracket order (for more information see Trading-Panel page).
2. Set order quantity, and TIF (Time in force)
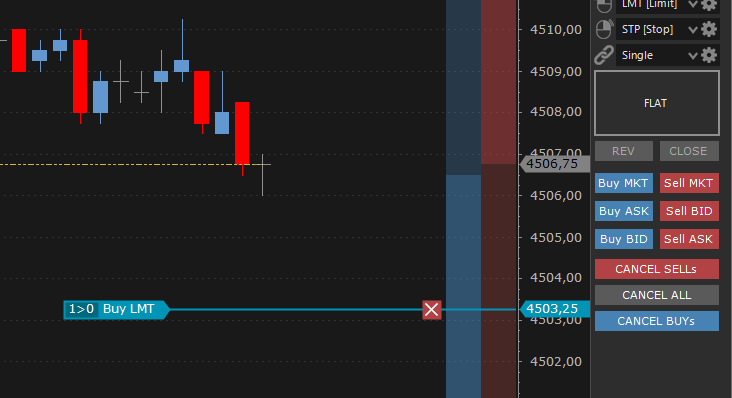
3. If the order is a buy order, go over the BID column (blue in the image), then:
- If the order is a LIMIT order, click with left mouse button on a price level lower than or equal to Best Bid (see in the image below the green area highlighted on BID column)
- If the order is a STOP order, click with right mouse button on a price level greater than Best Bid (see in the image below the yellow area highlighted on BID column)
If the order is a sell order, go over the ASK column (red in the image), then:
- If the order is a LIMIT order, click with left mouse button on a price level greater than or equal to Best Ask (see in the image below the green area highlighted on ASK column)
- If the order is a STOP order, click with right mouse button on a price level lower than Best Ask (see in the image below the yellow area highlighted on ASK column)
If with left mouse button (limit order) you click on areas highlighted in yellow, the limit order will most likely be executed immediately. For some traders this could be an inconvenience. To prevent placing limit orders by clicking on areas highlighted in yellow, deselect ‘Allow Left Click Above/Below market‘ property in Chart Trading Settings window (see below for a detailed description).
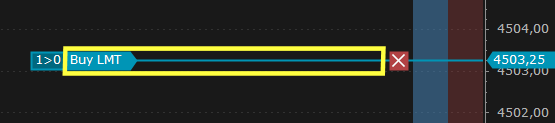
Once placed, the order is displayed on chart with a label:
Working orders are displayed on chart ONLY if chart trading is enabled! If trading is disabled in the chart or workspace, working orders are NOT displayed
Modify Order Price #
You can modify a working order price, in one of the following ways:
- left click on order label (yellow area in the image below) > move mouse pointer to the new price level > press left button again
- or right click on order label (yellow area in the image below) > Modify Price > Select the order to modify or Modify All if there are more orders in the same level.
Modify Order Quantity #
You can modify a working order quantity (if allowed), in one of the following ways:
- left click on order label (yellow area in the image below) > select the new quantity
- or right click on order label > Modify Quantity > Select the order to modify > select the new quantity
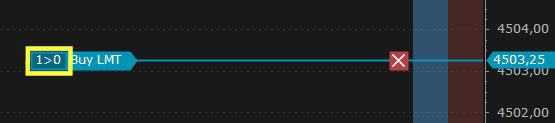
Cancel an Order #
You can cancel an order, in one of the following ways:
- Left Click on red X button of order label
- or right click on red X button of order label > Select the order to cancel or Cancel All to cancel all orders in the price level
To cancel all orders in the Chart or just buy/sell orders, press corresponding buttons on Trading-Panel. For more information see Trading-Panel page.
Place a MARKET Order #
You can place a MARKET order, i.e. an order to be executed immediately at the current Bid or Ask price depending on whether it is a sell or buy order respectively, in one of the following ways:
- Press Buy MKT or Sell MKT button respectively if you want to place a buy or sell market order
- or, if allowed by data-feed and by selected order type, left click on levels above Best BID to buy ‘at market‘, or left click on levels below Best ASK to sell ‘at market‘. To place a market order in this way, ‘Allow Left Click: Above/Below market‘ property must be checked in Chart Trading Settings window
Close or Reverse the Position #
You can close or reverse current position:
- by pressing respective buttons on label Position (see image below)
- or from Trading-Panel by pressing CLOSE or REV button respectively
Both functions also cancel ALL working orders of instrument/account. For more information, see Trading-Panel page.
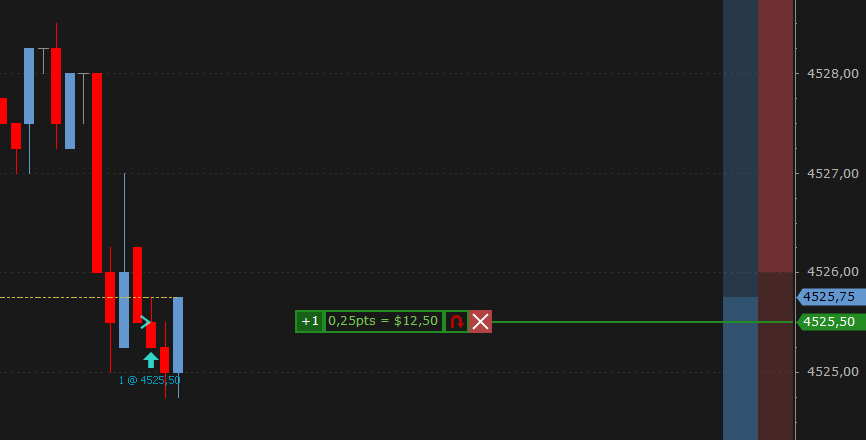
Display Filled Orders on Chart #
You can display filled orders on chart in the form of arrows indicating bar and execution price. You can also choose the arrow style and whether to display only buy or sell orders (see chart trading settings below).
To display filled orders you need to enable trading both in the chart and workspace
To show/hide all filled orders:
- right click on chart window > View > Filled Orders
Disable Chart Trading #
To disable trading on a chart:
- right click on chart window > DISABLE Chart Trading
- or from Chart Trading menu (top right of chart window) > DISABLE Chart Trading
To disable trading in the Workspace, press TRADING button at the top right of Workspace window.
Chart Trading Settings #
You can customize chart trading using properties available in Chart Trading menu (top right of chart window) > Settings.
Trading
- Allow Left Click: Above/Below market: If checked, it allows to place limit orders by left clicking on price levels above Best BID (BID column) and on price levels below Best ASK (ASK column). Orders placed in these areas will most likely be executed immediately
Trading Panel
- Width: defines trading panel width
- Position Label Format: Specifies what information to display about current position (quantity, price, Profit/Loss)
- Buy MKT / Sell MKT: If checked, Buy MKT and Sell MKT buttons are shown
- Buy ASK / Sell BID: If checked, Buy ASK and Sell BID buttons are shown
- Buy BID / Sell ASK: If checked, Buy BID and Sell ASK buttons are shown
Bid/Ask
- BID color: defines BID column color, i.e. column used to place BUY orders
- ASK color: defines ASK column color, i.e. column used to place SELL orders
- Columns: defines BID/ASK columns width and opacity
- Show ‘placeable-order-types’ Tooltip: specifies whether or not to display the tooltip indicating which order types can be placed at a given price level. The tooltip is shown by hovering over BID/ASK columns
- Show Price Level Info: specifies whether or not to display price level information when mouse pointer is over the order entry Bid/Ask columns
Position
- Profit/Loss Format: specifies how profit/loss is displayed in the Position label on chart
- Position Entry Price -> LONG: defines Position label color when the Position is LONG
- Position Entry Price -> SHORT: defines Position label color when the Position is SHORT
- Level Line: specifies Position label line style
Orders
- Order Label: Qty Format: specifies the format of quantity displayed on order label
- Level Line: specifies Order label line style
- You can also define the color to use to display orders (based on order type), the color to use to display order status, and the color to use to display OCO, OSO and BRACKET order link lines.
Filled Orders
- Display on chart: shows/hides all filled orders on chart
- Maximum number of orders to show: defines maximum number of filled orders to be displayed on chart (we recommend you not to overdo it)
- BUY: specifies whether to display BUY filled orders and defines their style
- SELL: specifies whether to display SELL filled orders and defines their style


