

Trading a MICRO contract using the historical and real time data of MINI contract is a typical CME futures case.
Follow these steps to set up a Futures instrument to trade MICRO contract using historical and real-time data from MINI:
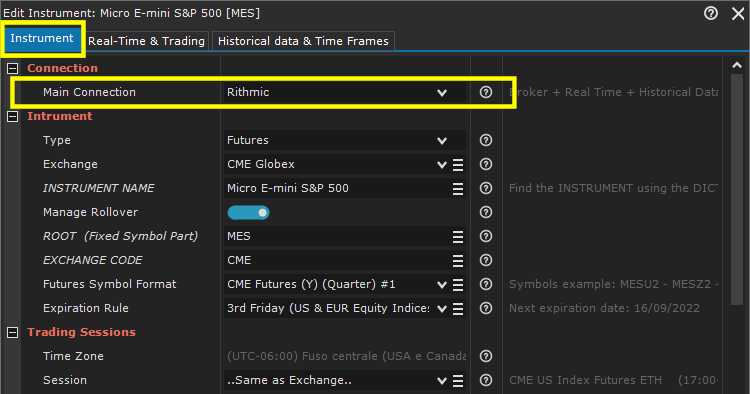
1. From Overcharts main window > Instruments Tab:
The instrument to configure is ALWAYS the one you want to trade on. In this specific case the MICRO.
Access MICRO instrument configuration (the instrument you want to trade on), belonging to the right connection. We remind you that each connection has its own instruments so be careful NOT to configure the instrument belonging to the wrong connection!
If the instrument is not already included in the instrument list, add it from Overcharts main window > Instruments Tab > Add Instrument button
2. Go to Real-Time Tab
3. In the REAL TIME section, DO NOT change connection. Instead, make sure it is the same as the connection set in the Main Connection property of Instrument Tab. WARNING: If you want to receive data from a connection other than the main one, refer to this documentation.
4. In the REAL TIME section, select Customize Symbol checkbox:
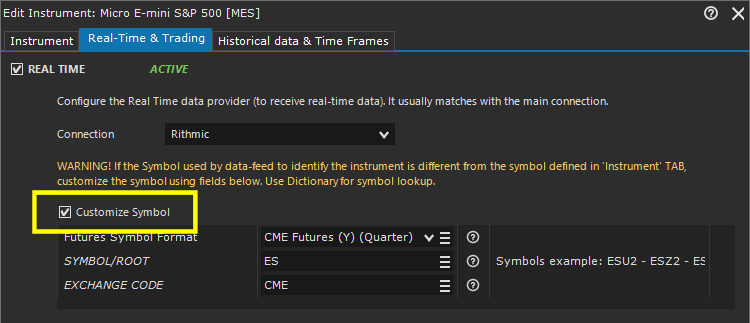
5. Depending on the case, you will need to configure the following properties:
- Futures Symbol Format: if property is present it means that the rollover management is enabled on instrument. Therefore, select the same Futures-Symbol-Format you find in the Instrument Tab:

- Symbol/Root:
- If rollover management is enabled on instrument and therefore Futures-Symbol-Format property is present, enter only the root of MINI instrument symbol. For example, root in symbol ESU22 is ES. In other words, root is the fixed part of instrument symbol that NEVER changes from one expiration to another of the contract.
- If rollover management is NOT enabled on instrument and therefore Futures-Symbol-Format property is NOT present, enter the full symbol of MINI instrument (i.e. ESU22).
If you do not know the correct MINI contract symbol, use dictionary to look up the symbol.
We remind you that if you enter the wrong symbol/root, nothing will work! Please do not rush to ask for support, but try to find the correct symbol yourself using the dictionary.
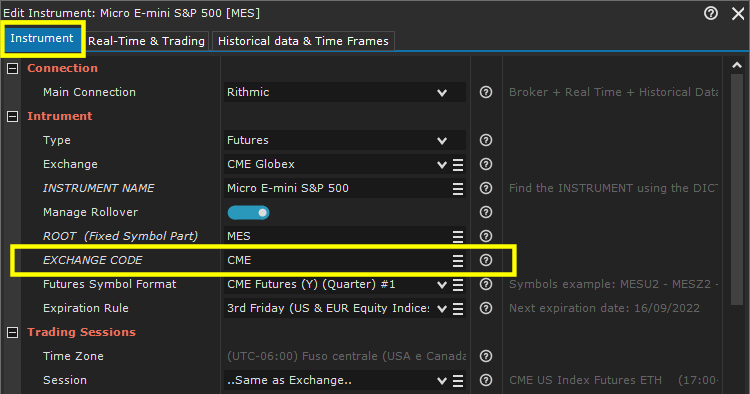
- Exchange Code: (only for some connections) if present, enter the exchange code. In 99% of cases it is the same code you can find in the Instrument Tab > Exchange Code property:
6. Go to Historical Data & Time Frames Tab and check if the connection and custom symbol are the same as you just configured in the Real Time section. If they are different, modify them following the instructions provided in step 5.
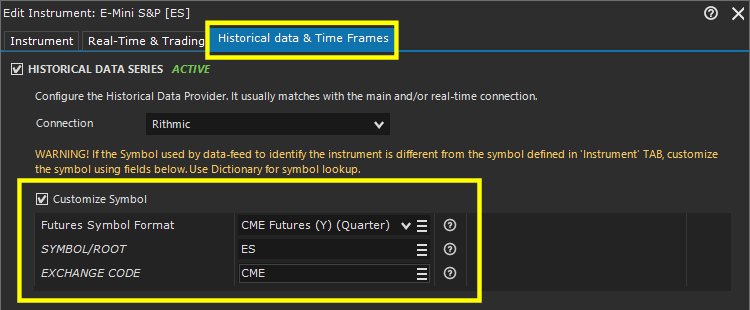
7. Save the configuration
8. Clear instrument database to delete existing data (RECOMMENDED):
- Instruments Tab > Right Click on instrument > Clear Instrument Database


